
In this, DevOps tutorial, in the environment set up, we have the created the VM ware manually and then install required operating systems like ubuntu ( Linux platform) manually. And we have this through manually through Graphical User Interface ( GUI). But, rather than the GUI, we can perform all these actions from the command line itself. And we can make it possible through Vagrant.
What is vagrant?
A vagrant is a software that is responsible to manage the development environment. It is just another name for Virtual machine. With this tool, through the command line, we can grab any available operating system and can install, configure, run various commands inside the operating system. This tool is responsible for making the entire process easy without effecting the main installation configuration files. Vagrant support Virtual box, Hyper -v and docker. Moreover, this tool can also manage other machines like Amazon Ec2, VM ware and so on.
What is the need for Vagrant?
Usually, the project works in a certain condition, where there a combination of several software packages. Developers manually install that software in the application environment to run it smoothly. And some software does have some sort of dependencies to install in the environment. So even though from the same software is downloaded from the same link/ package, the software might not get installed in the system. This is because of the dependency for that software. So to avoid these kinds of problems. we people use Vagrant which take care of all these dependencies.
Vagrant allows us to share the work set up easily among the team members, This tool plays a major role in deployment. It is responsible for making the necessary provision to the local system, before pushing to the actual environment. Moreover, vagrant provides an easy way to share and share the application using a single text file called the vagrant file.
So let us see the installation and working of this tool practically
Vagrant Installation:
Step -1:
Download the tool to your local system through the following link according to your operating system
https://www.vagrantup.com/downloads.html
step - 2:
Once the file gets downloaded to your machine, double click on the installer
step - 3:
Click on Run

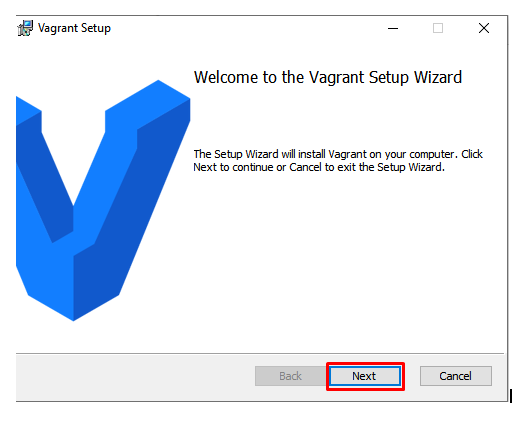
step - 4:
Click on Next
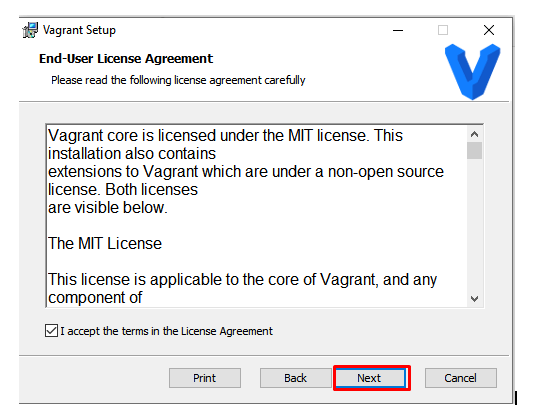
step - 5:
Accept the License agreement and click on Next.
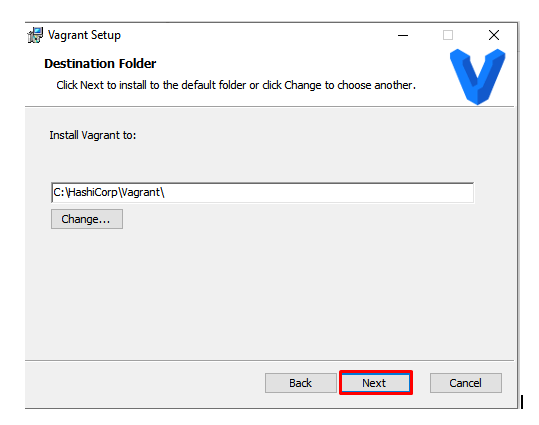
step - 6:
Click on Next
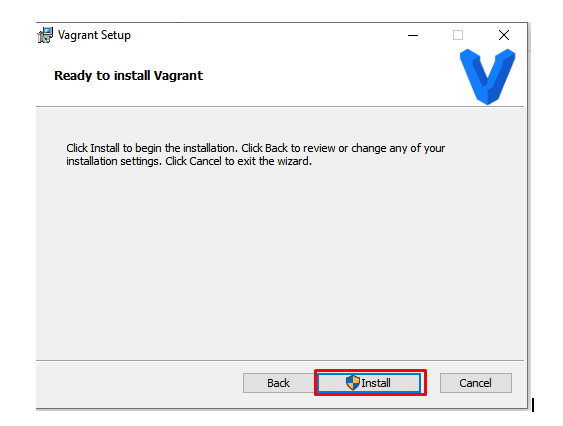
step - 7:
Click on install
Provide the confirmation of software installation (usually, it takes 5 minutes to complete the installation.)
step - 8:
Once, installation completed, click on FINISH
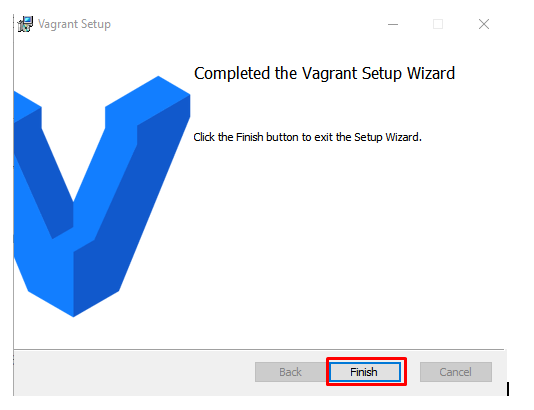
So once, you click on FINISH, you need to restart your system. Once, you restarted your system, you can see Hashicorp folder in your system. And if you too can see this in your system, you are INN in installing the vagrant.
Since, we have successfully installed vagrant, its time to create the environment
Creating an Environment:
We can automate the environment creation, through Vagrant using Command prompt. So open the command prompt and change the working directory bin of the Hashicorp. Once you have done, you can see your command prompt as shown below.

Now navigate to the following link and search for the box that you need
https://app.vagrantup.com/boxes/search
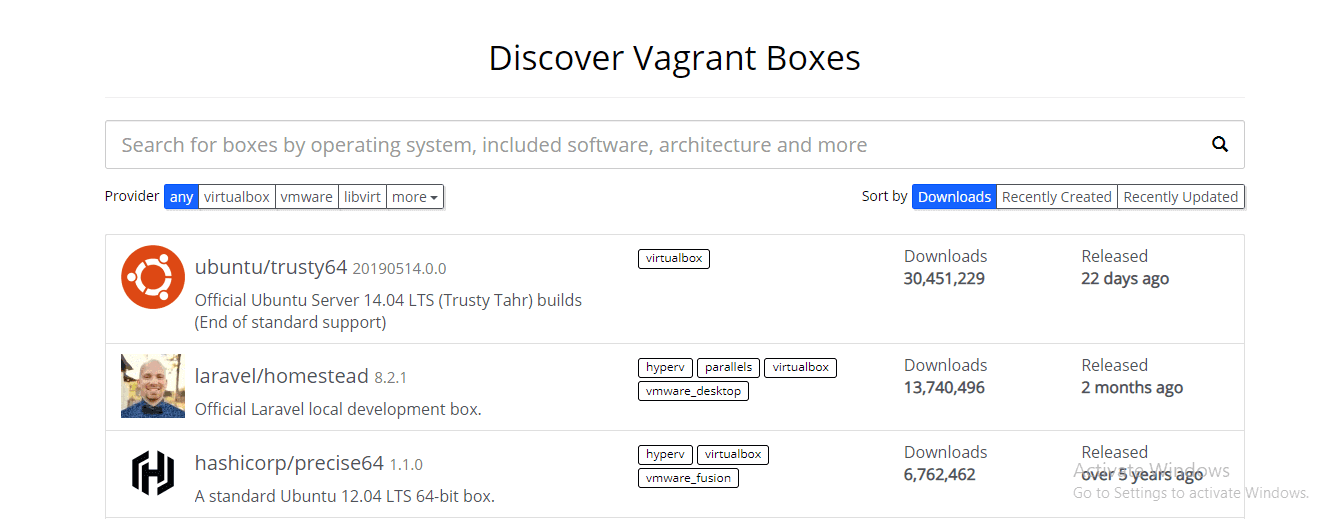
For instance, I would like to create the Ubuntu Environment.
so navigate to the command prompt and create the environment using the following command.

Once, installed, you can see your windows machines as follows:
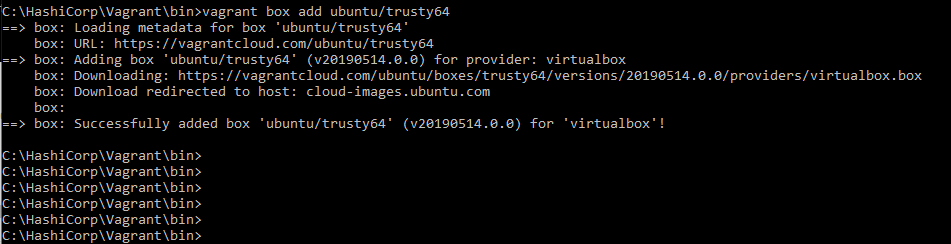
Initialize ubuntu using the following command
![]()
Once added, you can see the confirmation as shown below

If you get the same kind of error then navigate back to the user holder and run the same command as shown below

And create the vagrant image with the following command
![]()
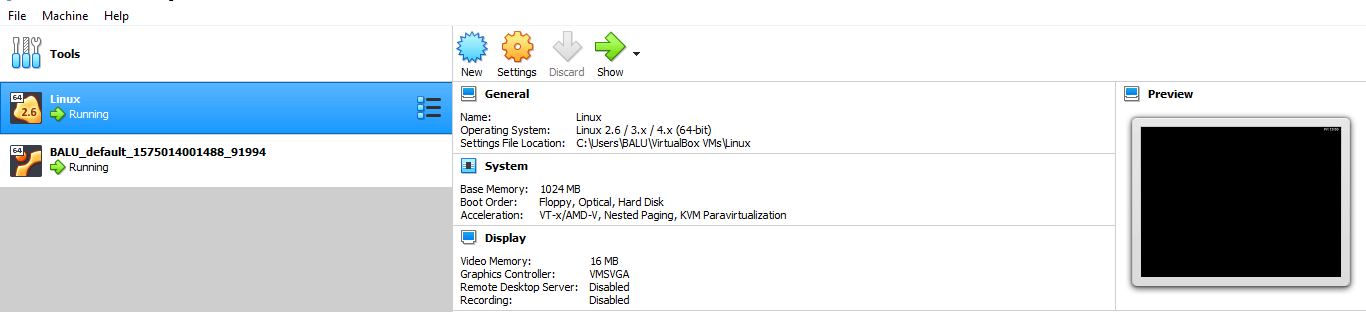
So once, the command gets executes, open your virtual box. Then you can see an image running there.
And once, you start running the machine trough Virtual box, you can see the screen that asks you to provide the username and password as shown below

Become the route with the following command
![]()
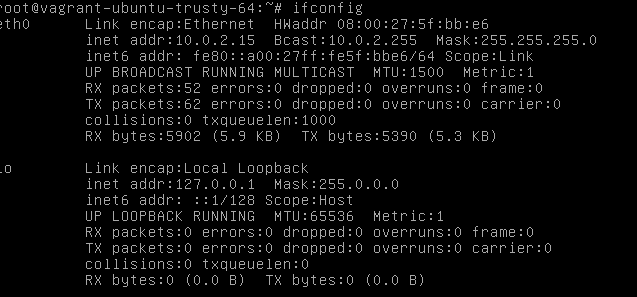
check the IP address of the machine using ifconfig
By default, you need it will be in series. So you need to change it to 192 series, by changing the NAT to bridge adopter in VMWare settings. And you need to mention the port as 2222 from putty session
So once login, you can utilize the machine as per your requirement.
Besides, this automation can be done through AWS instance.
So get those at DevOps Online Training