
It is another most important tool in the IT environment. For every tool/ resource " Necessity is the mother of invention". So this block provides you with the complete details of docker. It means
How the IT teams work before Docker came into existence. What were the problems faced at that time? What is the necessity to move to the tool like Docker? How this tool has solved all those problems.
So let us discuss one by one in detail
Before going to know what exactly docker, let us first understand.
||{"title":"Course Title 1", "subTitle":"Course sub title", "btnTitle":"View Details","url":"http://onlineitguru.com","boxType":"demo","videoId":"wq9flKrgZlY"}||
How does IT teamwork before Docker?
As mentioned you in my previous blocks, today developer develops an application using several technologies and framework. So for these technologies, the required software must be installed on the developer's local machines.
And once the developers develop the code, the codes move to the testing department. So the testing department needs to install the necessary software in their local machines to test the code. And once the applications work good in the testing department, then the code moves to the Quality Assurance(QA) Team. Like the development and testing team, the QA team also need to install the same dependencies in their local systems in order to check the application quality. So it means the same software couples needs to be installed in all the three systems. And if there is any other guy, would like to check the application features, the guys also need to install the same software in his local machine.
So it means there is a requirement to install the software in order to run the application in his/ her local system. This lead to the following problems
- Frequent installation of the same software on multiple systems.
- Increases the time to run the application
So to overcome this kind of problems in real the IT department moves to the new concept know as containerization. And docker uses this containerization concept.
And now let us first this containerization concept before going to know about docker
Containerization:
It is the type of virtualization that bring virtualization to the operating system level. It brings abstraction to the operating system.
How does the container work?
The Container working can be explained with the diagram shown below
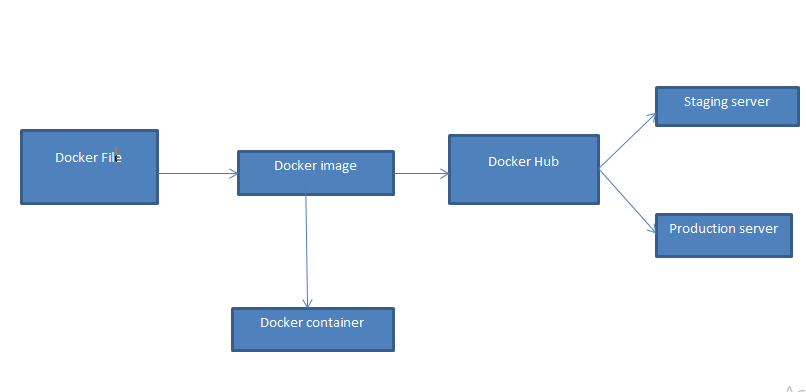 As shown above, the developer writes the code in the docker file. And with this file, we can create an image. And this image contains the entire project code. So with image, you can create as many as containers you need. Hence the image is created, we can develop to the docker hub. And finally, the image/ containers can be pulled either by the QA (or) the production team
What is the use of Containers?
- Containers do not the guest OS and use the hosts operating system. Hence the containers share the relevant resources and libraries when need
- since the application libraries and containers run on the host kernel, processing and execution are very fast.
- Since the containers were lightweight and faster than the virtual machines, booting takes only the fraction of seconds
How Containerization is different from Virtualization?
Virtualization Containerization Virtualizes hardware resources Virtualizes only software resources Requires complete OS installation for every VM Installs the containers only on the hosts OS A kernel is installed for every virtualized OS The kernel is used for underlying hosts operating system It weighs heavy It weights light Docker has limited performance It has native performance Docker is fully isolated It has process-level isolation Benefits of Containerization over virtualization?
- Containers were light in weight
- It boot-up process is short and takes a fraction of seconds
- Containers have better resource utilization when compared to VM's
As we got the basic knowledge of containerization, let us first discuss
What is docker?
Docker is a platform which packages the application and the dependencies together in the form of container.
This containerization ensures that the application works in any environment. Moreover, each and every application runs on separate containers and has its own set of libraries and dependencies. It means each application is independent of other applications and the applications don't interfere with each other.
So if the developer creates a container and delivers to the QA team, the QA team can run the container to get the replica of the developer environment. Hence it is designed to help both the developers and the testers. Hence the developers can develop the code without worrying about testing (or) the production environment.
Using a docker container, we can set up many instances of Jenkins, puppet and many more. Moreover, all the instances running in the same container (or) the different containers can be connected to one another with just a couple of commands. Moreover, with these containers, we can easily scale up the instances.
Since we have seen the theoretical definition of the docker, we will now move into some basic concepts of Docker.
Docker file:
It is the text file that contains all the commands, that the user can call on the command line to assemble an image. It means docker has the capability to build the image automatically. And docker builds using the instruction from the docker file. Hence you can use docker build to create an automatic build to execute several command-line instructions.
Docker image:
It is just like templates responsible for creating Docker containers. And these read-only blocks are the building blocks for docker container. And we can use docker run the image and create the container. Basically docker images were stored in the docker registry. And this can be either the local repository (or) the public repository like Docker hub. These public repositories allow multiple users to collaborate in building the application. These images were responsible to create and share the software between the people. Moreover, we can use the ready-made Docker image from the docker hub (or) we can create the new image as per our requirement.
Docker Container:
It is the running instance of the docker image. This holds the entire package needed to run the application. And basically, these are the ready application created from the docker images.
Docker engine:
It is a docker application that is installed on your host machine
It is basically the client-server application. Here the server uses the long-running program called daemon process. And the client acts like the command-line interface (CLI). And finally, Rest API is used for communication between the CLI client and the Daemon.
Docker Compose:
It is the YAML file that contains the information about services, network and volumes for setting up the docker application. And you can Docker compose, to create separate containers, host them and then communicate with them each other. Moreover, each container contains a port to communicate with one another.
Docker Swarm :
It is a technique used to create and maintain the docker engines cluster. And we can host these engines at different nodes. And these nodes which were at the remote locations form a cluster when connected in a swarm mode.
What is Docker Registry?
It is a place, where the Docker images were stored. This registry can be either the local repository (or) the public repository like docker hub. Through this hub, we can able to collaborate with multiple people in building the application. Moreover, with multiple teams within the same organization, can exchange (or) share the containers with the docker's hub ( Dockers hub is similar to GIT hub).
Docker Architecture:
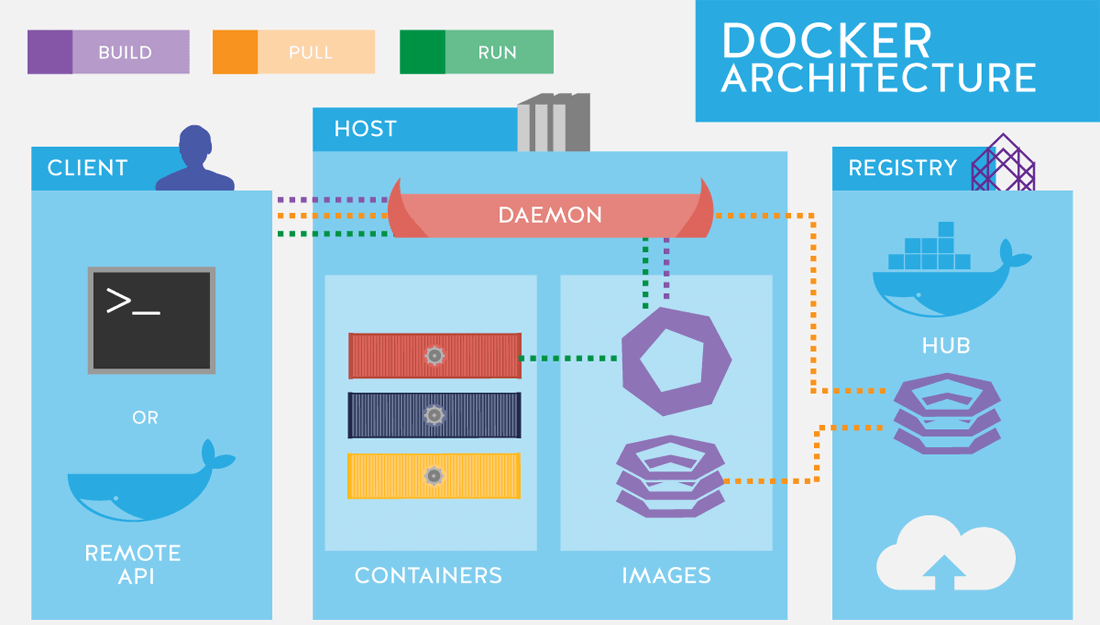 As shown in the above, we can build and run the docker images/ containers using docker client. (This client is also responsible to pull the images/containers form the host).
Docker host contains all the images/containers that are created at the client. ( It also contains the images/ containers that were pulled from the Docker repository.
Docker Registry stores all the images/ container that were created and run on the client as well as the daemon respectively.
Since we got the basic knowledge of docker working, let us discuss some popular commands that were being used int tutorial
Docker commands:
Command Usage Docker –version Displays the Docker version installed in the environment Docker-pull Pull ( download) the image from the repository Docker-run Creates a container using the image Docker ps List the running containers Dokcer ps –a Shows all the running and the listing containers Docker exec Access the running containers Docker stop Stops the running container Docker kill Kills the containers by stopping its execution Docker commit Create the new image of the edited temple Docker login Login to docker hub repository Docker push Pushes the image to the docker repository Docker images List the locally stored docker images Docker rm Removes the stopped container Docker rmi Remove the docker image from the local repository Docker build Builds an image using the docker file So let us see about this tool practically.
Working with Docker:
Create an ubuntu instance and execute the following steps:
step- 1:
change the hostname with the following command.
![]() step - 2:
step - 2:
navigate to /etc/hosts and add the change the name as shown below
![]() Once again login to the machine as root and execute the below steps
Once again login to the machine as root and execute the below steps
 step - 3:
install the docker into your machine with the following command
![]() step - 4:
step - 4:
Check the docker version using the following command
![]() step - 5:
step - 5:
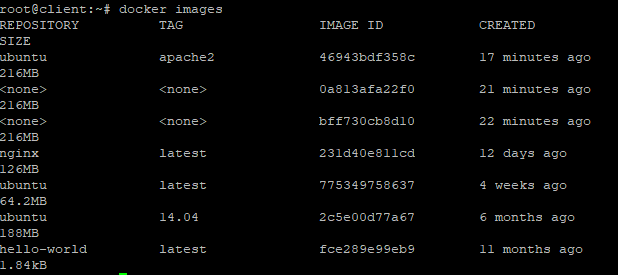
Check the availability of the images with the following command
![]() step - 6:
step - 6:
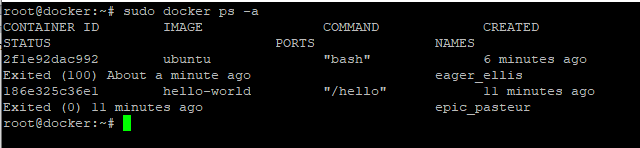
Check the docker working with the following command
![]() check the available images as shown above and you can observe one image is created.
check the available images as shown above and you can observe one image is created.
step - 7:
Create and install the ubuntu with the following command
![]() Once it gets installed, you can perform on the operations on ubuntu image.
Once it gets installed, you can perform on the operations on ubuntu image.
And you if you to come out of this container, use exit
check the availability of the container using the following command
 How to remove the docker container?
Remove the image with the following command.
sudo docker rm " epic_pasteur"
and check the availability of the containers
and now we will try to install Nginx
But in order to install this, we pull the image and then install it
![]() since we have downloaded the image, we need to install that image. And we can install using the following command
since we have downloaded the image, we need to install that image. And we can install using the following command
sudo docker run --name docker-nginx -p 80:80 nginx
How to create the webpage using Nginix?
create the directory with the following command
mkdir -p ~/docker-nginx/html
Navigate to that file using the following command
cd ~/docker-nginx/html
Open the html file and execute the following code
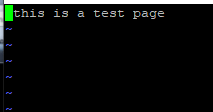
This is my first page This is my First Page
This nginx page is brought to you by Docker
and once you save the file, execute the following command
docker run --name docker-nginx -p 80:80 -d -v ~/docker-nginx/html:/usr/share/nginx/html nginx
So now open the public IP in your browser, then you see the following output
 How to link the file to the local system?
Docker tool allows linking the directories from virtual machines local file system to our containers. In our case, if we want to serve the web pages, we need to provide our container files to render. It means we will copy the files into the container as the part of docker file. So it means, using the docker volume feature, we can create the link between the local file system and the container file system. This feature allows the editing of our existing files. In addition, it also allows adding a new one to the directory and the container can automatically access the files.
Form the command line, we can access it as shown below
docker run --name docker-nginx -p 80:80 -d -v ~/docker-nginx/html:/usr/share/nginx/html nginx
And if you want to check the stats of the container, you can check with the following command
docker stats -a
.It is just similar to top command in Linux
I hope you people have successfully installed all these commands in your system. And if you struck up anywhere contact
Docker Online Training for detailed explanation
So now let us see
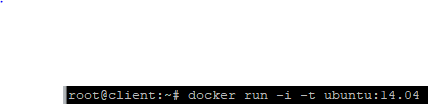
How to install ubuntu in an interactive way?
You can install ubuntu in an interactive way using the following command
docker run -i -t ubuntu:14.04 /bin/bash
 Once it gets installed, you can your current version of the container through /etc/issue
And once you move into that image you can perform all kinds of operations on ubuntu
And likewise, we can install any image as per our choice
So let us see
How to create a custom image?
Login to the above-created ubuntu image. And once you logged into the machine update the repositories. once update the repositories, install apache2 using the following command
step - 1:
![]() step -2:
step -2:
check the available file under /var/www/html
 step-3:
open the file and edit the code as u required
 once you added the code update save the file and exit from the file.
step -4:
Commit the image using the following command
docker commit -m "apache2 installed " -a "devops" c4bdfd8ca5d8 ubuntu:apache2
Once committed check the available images using the following docker images
 step -5:
create a container with the image
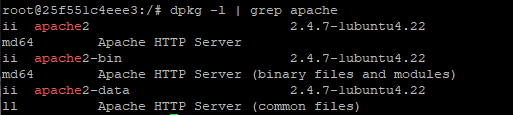
![]() check whether the apache is running or not using the following command.
check whether the apache is running or not using the following command.
 Apache2 creation:
step -1:
Also, check the status of the apache 2
service apache2 status
![]() step -2:
step -2:
since it is initially not running, run the service using the following command
![]() step-3:
step-3:
And once again check the status of the container
![]() step -4:
step -4:
So once it is running, just ctrl+p+q
And once you come out of the root, check the availability of the containers
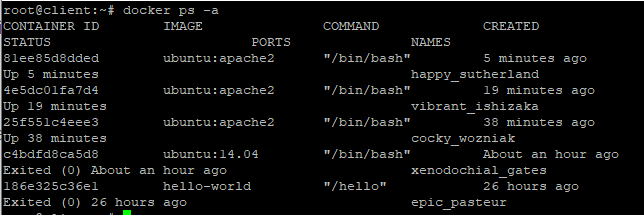 Hence, as shown above, apache is up running in our machine successfully. Open IPV4 public address in your browser, then you can see that HTML page out there. (But in this way you need to create port forwarding). So we can also do the same in the other way. But for that process remove the existing apache2 in your system and then execute the following commands
docker run -i -t --name docker-apache2 -p 80:80 ubuntu:apache2 /bin/bash
![]() check the apache status using the following command
check the apache status using the following command
![]() Start the service using the following command
Start the service using the following command
 Once again check the apache 2 status
 Pushing the image to the Docker hub:
And once the image is created, we need to push to the docker hub ( It means, you require an account in dockerhub.com). Hence once you have created and login to the account, you need to use the following command in your aws instance to login into the AWS account.
docker login
And once you provide this command, you need to provide login credentials of docker hub account. Hence once you are successfully login today the account, use the following command to push the image.
docker push "imagename"docker push ubuntu:apache2
And you can verify those image in the docker hub account. And once you can see those image, you are successful in creating and uploading your own container.
How to create the images using docker files?
step -1:
create one directory named docker and move into that directory
step -2:
Once you moved into that directory create the file using VIEW command and then execute the following command using that file and then save that file.
 Since the file is created, we need to convert this file into an image. And we can do so using the following command
![]() and once it was installed, you can see this image in docker images
and once it was installed, you can see this image in docker images
So, once the image is created, the next step will be the same as shown above.
How do we create a Word press server?
Besides, files and images, Docker tool allows creating a WordPress server. So let us see how to create a WordPress server.
step - 1:
create your own network with docker using the following command.
![]() step - 2 :
step - 2 :
Create a web server using the following command
docker run --name webserver --net mynet --ip 172.19.0.2 -h web1.example.com -p 80:80 -t -i ubuntu:trusty /bin/bash
![]() And once you run this command, you can see your machine as shown below ( hostname has changed)
And once you run this command, you can see your machine as shown below ( hostname has changed)
step -3:step- 3a :
update the repositories
![]() step -3b:
step -3b:
And once you update the repositories, you can install any kind of software as per your requirement.
Install some of the dependencies using the following command
apt-get -y install apache2 php5-mysql php5 libapache2-mod-php5 php5-mcrypt
![]() step - 4:
step - 4:
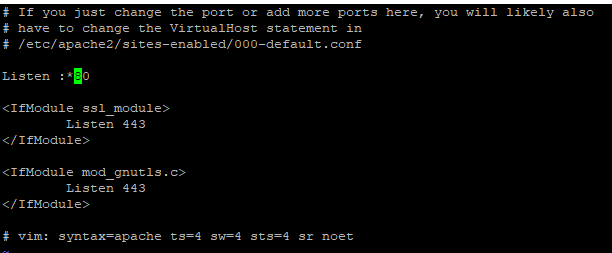
Perform some modification at /etc/apache2/ports.conf
check the file for listen 80 and replace with listen :*80
 step - 5:
restart you apache2 service with the following command
![]() step - 6: Download the WordPress application using the following command
step - 6: Download the WordPress application using the following command
step - 7:
install wget package
apt-get install wget mysql-client nmap -y
![]() step -8:Download WordPress with the following command
step -8:Download WordPress with the following command
wget http://wordpress.org/latest.tar.gz
![]() step -9:
step -9:
extract the WordPress file using the following command
![]() step -10:
step -10:
Check the available files and move into the WordPress directory.
step -11:
create a file uploads under wp-content
mkdir wp-content/uploads
![]() step -12:
step -12:
copy the files from config.sample.php to config.php
cp wp-config-sample.php wp-config.php
![]() step - 13:
step - 13:
open config.php and perform the following changes to the existing file.
remove the index.html file at /var/www/html
step - 14:
copy the WordPress to /var/www/html using rsync
apt-get install rsync -yrsync -avP ~/wordpress/ /var/www/html
And once you run the above command your press is ready
Mysql server creation:
step - 1:
Run MySQL into your system using the following command
docker run --name Mysql --net mynet --ip 172.19.0.3 -h mysql.example.com -p 3306:3306 -t -i ubuntu:trusty /bin/bash
![]() step - 2:
step - 2:
update the repositories.
![]() step - 3:
step - 3:
Install MySQL using the following command
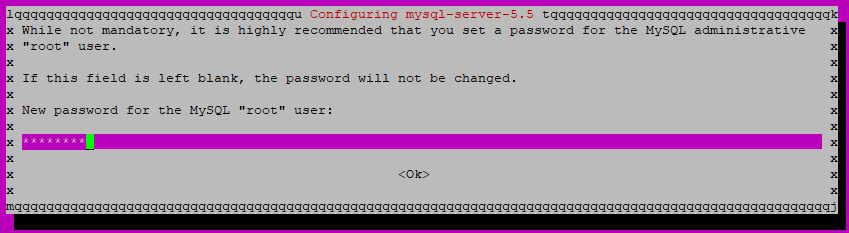
![]() step - 4:
step - 4:
provide any password ( u must provide twice for confirmation
 step - 5:
verify the MySQL installation using the following command.
![]() step - 6:
step - 6:
start the service using the following command
service mysql start
![]() step - 7:
step - 7:
Now configure MySQL using as shown below
Create and open the file at /etc/mysql/my.cnf
chang the bind-address
![]() Save the file
Save the file
step- 8:
restart the MySQL service
![]() step - 9:
step - 9:
login to MySQL database
![]() step - 10:
step - 10:
![]() step - 11:
step - 11:
Create the user as shown below
![]() step - 12:
step - 12:
Provide access to the user.
![]() step -13:
step -13:
Flush the privileges
![]() step-14:
step-14:
exit from the mysql.
And with this, Mysql installation is completed.
Wordpress account creation:
step- 1:
copy IP address of your machines and add /wp-admin/install.php to it and paste it in a browser.
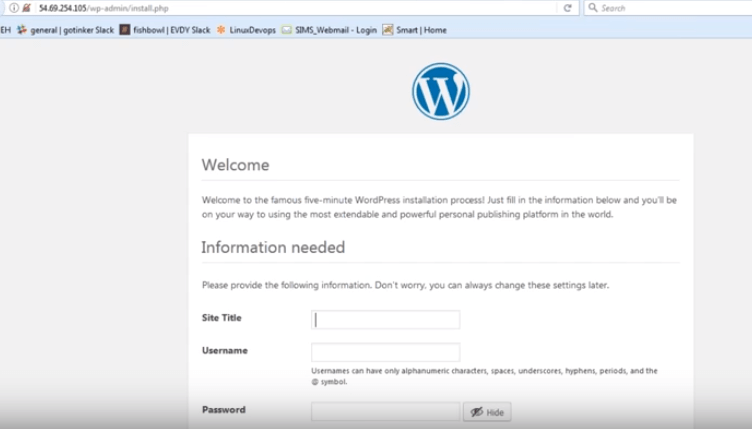 Fill the above details and finally click on install WordPress
step - 2:
Once its get installed, provide the login credentials
step - 3:
Start accessing your website.
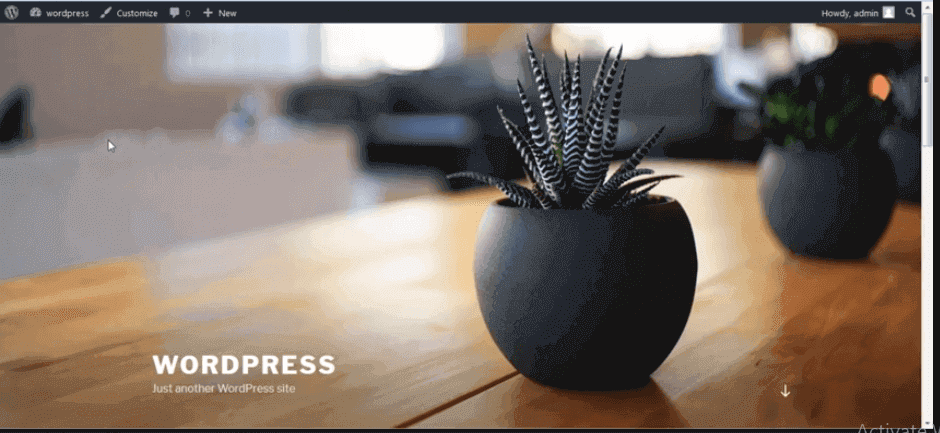
If you paste the IP address in your browser, you can view your website as shown below
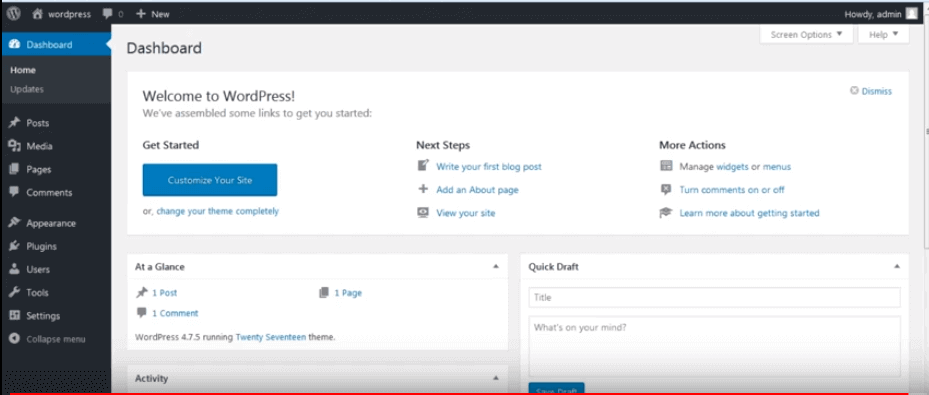 If you paste the IP address in your browser, you can view your website as shown below
What is docker composed?
step - 1:
Install pip using the following command
apt-get -y install python-pip·
![]() step - 2:
step - 2:
Install docker-compose
![]() step - 3:
step - 3:
pip install docker-compose
![]() step - 4:
step - 4:
create one-directory hello-world and move into that hello world
step -5:
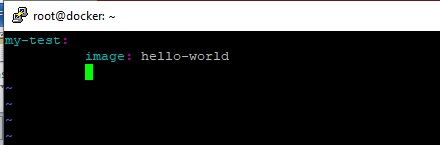
create docker-compose file
![]() step -6:
step -6:
Paste the details in your file
 step -7:
Run the file
![]() step - 8:
step - 8:
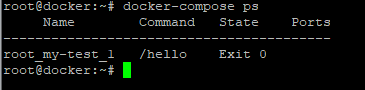
This work good when we run manually. But In order to act like service, we need to use -d option.
![]() step - 9:
step - 9:
Check the available instances.
 step -10:
Stop the instances
![]() step -11:
step -11:
Since it was stopped, we can remove the container
![]() And like this, we can do this Nginx as well as for Wordpress.
And like this, we can do this Nginx as well as for Wordpress.
Note:
Since docker is a lightweight tool, delete all your images and container whenever its use is completed.
How to scale your web server?
step -1:
make a directory named Web and move into that directory.
step - 2:
create and open the file named docker-compose.yml
![]() step - 3:
step - 3:
execute the following code
version: '3'services:web:image: nginxports:- 8080networks:- front-tier- back-tierlb:image: dockercloud/haproxyports:- 80:80links:- webnetworks:- front-tier- back-tiervolumes:- /var/run/docker.sock:/var/run/docker.socknetworks:front-tier:driver: bridgeback-tier:driver: bridge
step- 4:Run docker-compose file
docker-compose up –d
![]() step -5:
step -5:
Check the available containers
 step -6:
access the machine in the browser using load IP address
 Since initially the service is running, we can scale this service as per our requirement
docker-compose scale web=4
![]() Check the availability container. Then you can observe that 4 servers will be running
Check the availability container. Then you can observe that 4 servers will be running
 That's it, we are INN. So now let move to
What is Docker Swarm?
It is a technique used to create and maintain the docker engines cluster. And we can host these engines at different nodes. And these nodes which were at the remote locations form a cluster when connected in a swarm mode.
What is the use of Docker swarm?
Achieving high availability without any downtime for every service is the main use of Docker Swarm. With this high availability, we can impress various clients. ( Client search for the applications which has 0 % downtime)
Benefits of docker swarm:
Load balancing:
Like other services, docker swarm does auto-balancing of the applications. So due to high load balancing features, there is no necessity for the DevOps engineers to route the processing to the other nodes when one fails. Here the cluster manager will automatically perform load balancing for us.
Decentralised access:
It is another benefit for which many people use this tool. With this Decentralised access, all the nodes can be managed easily from the manager. Here the manager prompts the nodes on a regular basis. Hence the manager can track the status/ health of the node. So that he can serve the nodes without no downtime. So using the single command, you check the number of running nodes. Besides you can scale up (or) scale down the number of containers as per our requirement. So even after the application gets deployed, we can issue the rolling update to achieve continuous integration. Moreover, since rolling updates were issued one after one, there is no point for the downtime of the node.
What is Docker networking?
Docker networking is defined as a communication passage through which the isolated containers can communicate with each other, to perform required actions
What are the goals of docker Networking?
Flexibility:
Docker provides flexibility, by enabling the number of applications on various platform to communicate with each other
Cross-platform:
This tool can be used in cross-platform, to work across the various servers, through docker swarm clusters.
Scalability:
Docker is a fully distributed network, that enables the applications to grow and scale individually to ensure performance.
decentralized:
Docker uses a decentralized network, that enables applications to be highly available. So if the container (or) host is suddenly missing you can bring the additional resources (or) pass over the services that are still available.
user-friendly:
This user-friendly tool is easy to automate the deployment of service, that is easy to use in our day-to-day life.
support:
Docker offers out-of-box support. So the ability to use docker enterprise edition, get all the functionality very easy and straight forward. And these features make the effective use of docker.
Explain Container Network Model?
Container Network Model standardizes the steps required to provide networking for containers using multiple network drivers. Besides, it requires a distributed key-value store like the console to store the network configurations. This CNM has the interfaces for IPAM and the network plugins
Usually, IPAM plugins are responsible to create/delete the address pool (or) allocate/ deallocate the IP address. On the other hand, the Network plugin API was responsible for creating/deleting the networks and add/remove the containers from the network
This CNM is mainly built on 5 objects, let us discuss them in detail
Container Network Model Objects:
Driver:
It owns the network and is responsible for managing the network through multiple drivers. It satisfies various uses cases and deployment scenarios.
Network:
It provides the connectivity to the group of endpoints, that belongs to the same network and isolates from the network. So whenever, a network is created/ updated, the corresponding driver will be notified of that event
Network Controller:
It provides the entry point to the lib network, that exposes the simple API to its engine. This engine allocates and manages the networks. Since libnetwork supports multiple inbuilt and remote drivers, hence the network cables attach the particular driver to the network.
Endpoints:
It provides the connectivity of the services exposed by the container in a network, with other services, provided by other services in the network. Basically an endpoint represents is a service, and does not require to be the container.
Sandbox:
It will be created, when the users create an endpoint on the network. Usually, a sandbox can have multiple endpoints attached to the different networks that represent the network configuration such as IP address, Mac Address, routes and DNS.
Get real time explanation of container network objects through DevOps training
Since, till we have seen regarding the networks, let us discuss
Network Driver types:
Network drivers were basically divided into 5 types. They are:
Bridge:
It is a default, private internal network created by docker on the host. Here, all the containers get an internal IP address, and these containers can access each other using internal IP. Usually, these bridge networks are used, when your applications run in standalone containers, that needs to communicate
Overlay:
It creates an internal private network that spans across all the nodes participating in the network cluster. Hence the overlay networks, facilitate the communication between the swarm service and a standalone container. (or) in between the two standalone containers on different daemons
Host:
This driver removes the network isolation between the docker host and docker containers to use the host networking directly. Hence with this, you will not be able to run multiple web containers, on the same host, as well as on the same port. And this port is common to all the containers in the network hosts.
None:
In this kind of network, the containers were not attached to any network and do not have access to an external network (or) containers. Hence this network is applied, when you want to completely disable the networking stack on the container.
Macvlan:
This type allows you to assign a MAC address to the container. Hence this network makes appear on the physical devices on your network. Moreover, the docker daemon route the traffic to containers using the MAC address. Hence it is considered as the best choice when you are desired to connect to the physical network rather than through its host network stack.
Hence, we got the basic idea on network driver types, we can choose the driver according to our requirement.
...